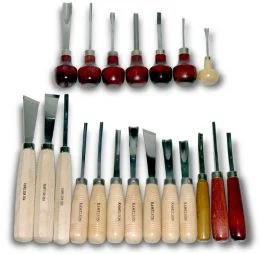
Before we start the wood carving, it is very necessary to check all the equipment which are required during the process. Find out some of the equipment which is needed for the wood carving.
The screw cramp
This is of German design and used in the same way as the 'G' cramp.
Sash cramps
These range in length from 3 ft. to 6 ft. and are used by joiners for assembling frames. For this reason the jaws are only 2 in. or 3 in. long.
The carver will find them useful in gluing up large work if he uses them in pairs with a stout board on each side of his work. In figure 10 the arms of a figure are being glued up at the shoulders.
The sloping stand or table
With the help and advice of friends I have recently evolved this piece of equipment and have found it excellent for carving both wood and stone panels.
For anyone with a little knowledge of carpentry it is a fairly simple piece of construction. The framework is made of wood 2 inch x 2 inch and the main board is 36 inch x 16 inch The whole stand could be made smaller or larger, according to your own requirements.
You will see from the picture of the back view illustrated that the stand is adjustable on the deck-chair principle. This particular model can be used at three different angles. The hinges on the supporting frame should be of a heavy type and not less than 2 inch in width as they will have to stand up to a good deal of vibration.
The wood of the main board should be at least 1 in. in thickness. The wood to be carved can be fixed on by bench screws, 'G' cramps, or by ordinary screws. This stand can be easily bolted down to the bench. The advantage of a sloping stand is that you can stand upright to carve and step back to see your work.
Other methods of fixing a panel
If you want your work flat on the bench, and many carvers do, it is an easy matter to fix the panel. Bench screws can be used (see Fig. 9). The length of these can be varied by interposing a block of wood between the wing nut and the underside of the bench. You can also fix a frame of wood around your carving and drive in a few wooden wedges to hold it tight (Fig. 37). If you are working on a fairly heavy piece of wood, two wood stops screwed down at right angles to each other will be sufficient.
With all the guidelines which are provided in this article, now we know the things which are required for the wood carving. Check for some carpentry equipment available, which you might also need it during the wood carving process.
Tags
articales
wood carving articales
Wood Carving for Beginners
wood carving free pattern
Wood Carving Tools
Wood for Carving

